4. Six glorious commands
Six Glorious Commands
Unix
Things covered here:
- Here we’re going to touch upon 6 glorious commands that are absolutely worth having in our toolkit!
Let’s change back into our starting
unix_introdirectory:cd ~/unix_intro
We’ll mostly be working with a file here called “gene_annotations.tsv”, which is a tab-delimited table holding genes IDs, their source genome, and some annotation info. To help orient us, here is a peek at it in a spreadsheet program:
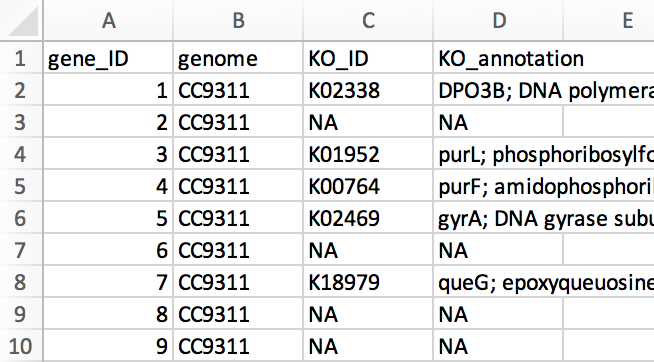
We can see the file has 4 columns: “gene_ID”, “genome”, “KO_ID”, and “KO_annotation” (KO is for Kegg Orthology, a popular functional database). Let’s change into our working directory for this page and explore it a little at the command line with some of the things we’ve seen already.
cd six_commands/
ls
head gene_annotations.tsv
We can also just pull out the header if we’d like by setting the number of lines head prints out to 1:
head -n 1 gene_annotations.tsv
And let’s count how many rows there are:
wc -l gene_annotations.tsv
Now that we know something about the file we’re working with, let’s get to some new commands!
The Goods
cut
cut is a command that’s great for manipulating columns. The required arguments for cut are which columns we want, and from which file. Here’s how we can use cut to pull out just the gene_ID column (column 1):
cut -f 1 gene_annotations.tsv
That is printing out all of the lines to the screen though, let’s pipe | it into head for now to keep things manageable while we’re working on it (remember we can bring up a previous command by pressing up):
cut -f 1 gene_annotations.tsv | head
Here we are specifying which column we want with the -f parameter (for field). We can specify multiple individual columns if we separate them with a comma:
cut -f 1,3 gene_annotations.tsv | head
And a range of columns if we join them with a dash:
cut -f 1-3 gene_annotations.tsv | head
Just like in spreadsheet programs, cut thinks about where columns start and stop based on a delimiter, like a comma or a tab. The default setting is a tab, so we didn’t need to change it for that file. But if we try using it on a comma separated values file (a csv), things don’t work well:
cut -f 1-3 example_gene_annotations.csv | head
Unless we tell cut the delimiter is a comma, which we can do with the -d parameter:
cut -d "," -f 1-3 example_gene_annotations.csv | head
cut -f 1,4 gene_annotations.tsv | head
cut -f 1,4 gene_annotations.tsv > IDs_and_annotations.tsv
head IDs_and_annotations.tsv
And to make sure it holds all 101 lines and not just the first 10!
wc -l IDs_and_annotations.tsv
grep
grep (global regular expression) is a search tool. It looks through text files for strings (sequences of characters). In its default usage, grep will look for whatever string of characters you give it (1st positional argument), in whichever file you specify (2nd positional argument), and then print out the lines that contain what you searched for. Let’s try it:
head colors.txt

grep blue colors.txt
If there are multiple lines that match, grep will print them all:
grep re colors.txt
If what we are looking for is not in the file, we will just get our prompt back with nothing printed out:
grep purple colors.txt
Back to our gene annotations file, remember it holds KO-annotation information in the 3rd and 4th columns:
head -n 1 gene_annotations.tsv
For the moment, let’s pretend we’re interested in genes predicted to encode for the enzyme epoxyqueuosine reductase for some reason. If we search at the KO website for this, it tells us that there are 2 KO_IDs associated with it: K09765 and K18979. grep is a super-quick way to see if they are in our annotations file:
grep K09765 gene_annotations.tsv

grep K18979 gene_annotations.tsv
It seems the first one wasn’t found in our genomes, but the second one is in there twice!
grep K18979 gene_annotations.tsv | cut -f 2Being able to stick together these individual pieces like this becomes a really valuable toolset to have at our disposal!
We’re just scratching the surface of what grep can do, but one thing worth mentioning is the -c flag. This tells grep to just report how many lines matched, instead of printing them to the screen:
grep -c K18979 gene_annotations.tsv
paste
Like cut, paste also works with columns. It pastes things together horizontally with a delimiter in between them (a tab by default).
We have another file in our working directory that holds some color names in Spanish:
head colores.txt
For a quick example of how paste works, let’s paste this file to our “colors.txt” file:
paste colors.txt colores.txt
For a more practical example, let’s look at another file in our directory that holds the amino acid lengths and sequences of our genes:
head genes_and_seqs.tsv
If the lines are longer than the terminal window, then they will wrap like this and look kind of messy. We can take a look without linewraps with the less program by adding the -S option:
less -S genes_and_seqs.tsv
In this view things run off the screen, but each line is one row. Note that the terminal doesn’t automatically line up columns for us. q will exit less.
Let’s say we want to add these protein lengths and sequences to our “gene_annotations.tsv” file. We can paste the two files together, but then we’ll have two columns for gene_ID (columns 1 and 5):
paste gene_annotations.tsv genes_and_seqs.tsv | head -n 1
Note: If a “paste: write error: Broken pipe” message pops up here, it can be ignored. It is just happening because the
headcommand is finishing before thepastecommand, and thenpasteis telling us it had nowhere to send the output anymore. But since all we care about is the first line here, it does not affect what we’re doing. (Not all systems do things this way, so you may or may not see that.)
If we wanted to take everything except the fifth column (the second “gene_ID” column), we could do it like this:
paste gene_annotations.tsv genes_and_seqs.tsv | cut -f 1-4,6- | head -n 2
Notice that by putting the dash after the 6, and nothing else, we are specifying that column and all that follow.
NOTE:
pasteis a super-useful command. But it does not check to make sure what we are doing makes sense. If these files were out of order from each other,pastewould still be just as happy to stick them together and then our merged file would hold mismatched information. So it’s important to make sure things we are pasting together are in the appropriate order. It’s a little too far off the path for now, but just to note them, useful commands to look into for doing this would besortandcomm🙂
sed
sed (for stream editor) is our “search and replace” command, just like in something like Excel or Word, but much more powerful. Like many of the commands here, sed is useful in just general usage, but you can also learn to do a lot more with it if you need/want to at some point. For now, let’s look at the general usage.
Let’s imagine a totally-not-real, never-happened scenario where co-authors waited until our paper was accepted (and we’d even approved the proofs already) to then tell us they want to change the name of one of the new genomes in it 🤦 So now we need to change all instances of “UW179A” to “UW277”.
This genome happens to be at the end of our file, so we can check it with tail if we’d like:
tail gene_annotations.tsv
The syntax of sed is a little strange at first, so let’s run it and then break it down (don’t forget, feel free to copy and paste things):
sed 's/UW179A/UW277/' gene_annotations.tsv | tail
Here, the
sedcommand is followed by an expression within single quotes (this whole expression one positional argument we are passing to thesedprogram). This expression holds 4 items separated by the 3 forward slashes in there: the 1st is the letter “s”, which is for “substitute”; the 2nd is what we’d like to find and replace, “UW179A”; the 3rd is what we’d like to replace it with, “UW277”; and the 4th is actually empty in this case (the next example will use that slot).
Now that we’ve previewed this, we can remove the tail and write the new version to a file with a redirector:
sed 's/UW179A/UW277/' gene_annotations.tsv > modified_gene_annotations.tsv

tail modified_gene_annotations.tsv
And note that this did not alter the original file:
tail gene_annotations.tsv
One important thing to know about sed is that by default it will only change the first occurrence of something in a line. For example, let’s say we need to change all occurrences of “NA” to “<NA>” to fit a certain program we want to use:
head gene_annotations.tsv

sed 's/NA/<NA>/' gene_annotations.tsv | head
Note that only the first occurrence in each line was changed. To change that behavior, we need to add a “g” (for global) to that fourth slot like so:
sed 's/NA/<NA>/g' gene_annotations.tsv | head
And now all instances are replaced.
There is however another problem we would need to address. You may have noticed that all places where “NA” occurred were changed, including places that said things like “DNA” in the “KO_annotation” column. This isn’t ideal in this case, and this example was a little contrived just to show the g parameter of sed. There are ways to make sed work with exact words only (so it wouldn’t affect things within longer strings like “DNA”), but those get a little tricky and vary by what type of Unix system we are working on, so they’re a little bit beyond our current scope. We could also accomplish our current goal here by utilizing a combination of cut, sed, and paste, but here are two sed-only ways that would work on Darwin (the Mac Unix-like environment) and GNU (one of the most common Unix-like environments):
Match only exact words on GNU (what our Binders are):
sed 's/\<NA\>/<NA>/g' gene_annotations.tsv | head
To tell sed only to match and change exact words on a GNU system, we need to surround our pattern with “<” and “>”, but we need to escape slash them so that it doesn’t treat them as the normal characters and look for them.
Match only exact words on Mac (Darwin):
sed "s/[[:<:]]NA[[:>:]]/<NA>/g" gene_annotations.tsv | head
To tell sed to only replace exact words on a Darwin system, we need to surround our pattern with these longer “[[:<:]]” and “[[:>:]]”.
These quick examples were just looking for exact matches, but sed has very powerful pattern searching features (building off of what special characters like *, ?, and others can do, though slightly differently) that we can look into as needed.
awk
awk is even more expansive than any of the others we’ve seen, but like the others, just being familiar with its basic command-line usage can be powerful. awk is useful for doing things like filtering based on columns and doing calculations.
The syntax of awk can also take a little getting used to. For some examples, we’re going to work with a typical BLAST output table. Let’s take a look at it first with head:
head blast_output.tsv
Here we have 6 columns: “query” is our input sequence ; “qlen” is the length of the query; “subject” is the reference sequence our query hit; “slen” is subject length; “pident” is percent identity; and “al_length” is the length of the alignment.
After blasting, it is common to want to filter the output by some criteria. For the first example, let’s say we only want to keep hits that percent identities greater than 95%. For awk, we specify which columns we want to act on with a $ followed by the column number. In this case, the percent identity is column 5, and we put the whole expression within quotes so it is sent to awk as one argument:
awk ' $5 > 95 ' blast_output.tsv
Note that this returns the column header too. That tells us that
awkis not filtering out text when doing a numeric comparison like this.
We can also do this sort of filtering based on multiple conditions by connecting them with “and/or” type statements. An “and” in awk is specified with &&, and an “or” is specified with two pipes, ||. Let’s say we want our 95% ID criterion, but we also want the query length to be greater than 1000:
awk ' $5 > 95 && $2 > 1000 ' blast_output.tsv
We can also perform calculations on-the-fly to filter columns with awk. BLAST is a “local” aligner, which means we can have just a small portion of our input sequence align to something with a very high percent identity, but taken as a whole the sequences may be very different. The second row from the last command shows an example of this:
query   qlen    subject slen    pident  al_length
Te_4133 1470    3R_1087 8642    100.0   200
Query sequence “Te_4133” hit a reference sequence with 100% identity, but the alignment length is only 200 while the input sequence (the query) length is 1470. Depending on what we are doing, this might not be what we want. It is common to filter out hits like this by requiring some minimum fraction of the query sequence to have successfully aligned.
Here is how we can tell awk to only keep the hits that are greater than 95% identical AND if more than 90% of the query sequence aligned:
awk ' $5 > 95 && $6 > $2 * 0.9 ' blast_output.tsv
Again, awk can seem pretty tricky, especially at first, but forunately we don’t need to remember how to do these things, just that they can be done. And then we can look it up when we need it 🙂
tr
The last one we’re going to look at is tr (for translate). tr changes one character into another character. It seems to become more useful with time, but it’s worth knowing early if for no other reason than it deals with special characters really well – the type of special characters that some Excel versions put in exported tables that can mess up working with them at the command line.
For example, when exporting a table as tab-delimited or as a csv file from some versions of Excel, there will be different newline characters than the command line is expecting (newline characters tell the computer to end one line and start a new one). The typical newline character is represented like this \n, but some Excel versions put in \r characters. We can see this messing with things on the Excel-exported file if we open it with less:
less gene_annotations_excel_exported.tsv
Where everywhere there should be a line break, there is an odd ^M thing going on (hit q to exit less). We can also see it if we try to count the number of lines:
wc -l gene_annotations_excel_exported.tsv
wc -l actually just counts the newline characters in a file (normally \n), so here it finds none.
But this is where tr comes to the rescue. These characters can be swapped so that working between Excel and the command-line is no longer a problem and we can enjoy both worlds 🙂
The tr command does not accept the file you want to work on as a positional argument like many of the other commands we’ve seen. Instead we need to use a new redirector, <. While > as we’ve seen handles the output, < handles the input. It gives the file following it to the program in front of it:
tr "\r" "\n" < gene_annotations_excel_exported.tsv > gene_annotations_fixed.tsv
Now we can see the new file we made is ready for the command line (q exits less):
less gene_annotations_fixed.tsv
And we can see that the command-line now recognizes the newline characters by trying to count the number of lines again:
wc -l gene_annotations_fixed.tsv
Some may say this could be done with
sed, and that’s true, sometimes. When it comes to dealing with special characters like these,sedcan operate pretty differently depending on which type of Unix-like environment we are in (e.g. on a Mac OSX distribution vs typical Linux distributions). And it can get tricky to specify these newline characters appropriately. So I find it safer and more portable to usetrlike above 👍
Summary
As mentioned, this page is just a first introduction to some great commands that are worth having in our toolkit. Each of them has much more functionality that we can dig into further as needed 🙂
Next we’re going to look at variables and for loops!
Commands introduced:
| Command | Function (base-usage) |
|---|---|
cut |
cuts columns from tables |
grep |
finds matching text and returns lines |
paste |
sticks columns or files together horizontally |
sed |
search and replace |
awk |
good for filtering columns and calculations |
tr |
swap characters for other characters (translate) |