An introduction to startup files, aliases, and functions along with some helpful things I like to do with them
More automation power
Unix
A large part of the value of working at a Unix-like command-line is the way it easily lets us automate things. In this vein, there are many things we can do to customize our Unix-like command-line environment, including things to make ourselves more efficient when working there.
This page introduces the concepts of startup files, aliases, and functions while demonstrating a handful of things I find helpful enough that I typically set them up right away anytime I start working on a new system 🙂
NOTE
This page assumes we already have some familiarity with working at a Unix-like command-line. If that’s not the case yet, then consider running through the Unix crash course first 🙂
What is a startup file?
High-level, a startup file is a file that is automatically run everytime a command-line session is started. startup files are integral to setting up our working environment properly. These files are just like shell scripts, in that they do the same thing as if we were running each line one at a time by ourselves, but it is all taken care of for us automatically whenever a new session is started.
As mentioned, these files are integral to setting up our working environment, and while unlikely, it is possible we could mess them up. Don’t worry about that too much though. There is a standard template for all users, and if things somehow went wrong, we could have whoever handles our user account just replace the one we messed up if needed. And we can always make a backup copy of them before starting to alter them if wanted 🙂
NOTE
The actual filenames of the startup files used below are appropriate if we are using abashshell, making the filenames, e.g.,~/.bashrcand~/.bash_aliases. If working with a different shell, these files will be named differently – e.g., if usingZ shell, it would be~/.zshrcand~/.zsh_aliases, and the files in codeblocks below would need to be changed accordingly. We can see which shell we are using by runningecho $0.
Modifying our prompt to facilitate ‘scp’
The prompt is the text in front of our cursor at the command line. scp (secure copy) is a program that lets us send files between different machines. It has the same syntax as the cp command, where the first positional argument is what we want to copy, and the second (or last if we have multiple things we want to copy) is where we want it to go. In whichever positional argument we are specifying the remote machine’s location, we first have to indicate how to find the remote machine in a similar fashion to what we enter to connect to it with ssh.
I like to modify my prompt so that it has that information and the full path to the current working directory I am in. Then, when I want to scp files to or from where I am working on a remote machine, I can just copy my prompt to help quickly build the command.
For example, if I typically login with ssh mike@microbialomics.org, and I set up my prompt on the remote machine I am working on to look like this:

When I want to scp a file to or from there, I can just highlight and copy the whole prompt:

And paste it in and add the filename to quickly create the argument saying where the file is as I build the scp command on my other computer:

This is super-convenient when sending files back and forth 🙂
How we can change it
This prompt is held in a variable called PS1, which is typically set in the ~/.bashrc file (if in a bash shell, see note above). We could just change that variable interactively at the command-line if we only wanted to change it for the current session, but to change it for good, we should alter it in the ~/.bashrc file. It is easiest to edit files like this at the command-line with a text editor such as nano. E.g., we can open this file and start looking through it with:
nano ~/.bashrc
As a reminder, to exit nano without saving anything, we can press ctrl+x (then the letter n if that didn’t already completely exit. And to exit nano with saving our changes, we can press ctrl+x, then the letter y, then enter/return.
In many systems, the part that handles the prompt in the ~/.bashrc file will look something like this initially:
if [ "$color_prompt" = yes ]; then
    PS1='${debian_chroot:+($debian_chroot)}\[\033[01;32m\]\u@\h\[\033[00m\]:\[\033[01;34m\]\w\[\033[00m\]\$ '
else
    PS1='${debian_chroot:+($debian_chroot)}\u@\h:\w\$ '
fi
There is a lot of mess in there, but looking just at the first PS1 line above, the key parts we currently care about that affect the actual text of the prompt that we see in our terminal are:
\u- this is a shortcut for our username@- here is our @ symbol separating the username from what’s next\h- this is a shortcut for the hostname of the maching we are on (we can see it by runninghostname):- separating those prior things from the current working directory\w- a shortcut for current working directory (displayed from the~/home location)\$- the dollar-sign at the end followed by an empty space, so our cursor starts after that
This gives us something like this as our prompt (where each <…> would be replaced with the actual info:
<username>@<hostname>:<current_working_directory> $
As mentioned, I like to change this so it matches exactly what I would need to type run an scp command. In this case, for me that requires changing the part after the @ symbol (what is set by \h in the above right now) so that it is exactly whatever I need to type when I ssh into the machine. And I like to change the part after the colon (which is set by \w in the above) so that it is the full, absolute path, rather than the path starting from the home location (which is what \w gives us).
So if I ssh into the machine like this, for example:
ssh mike@microbialomics.org
I would change the \h to be microbialomics.org.
And to get the full, absolute path, I would change the \w to ${PWD} (a variable that holds the full path to the current working directory).
I typically copy the original settings, comment them out (but leave them there so I still have them in case I want them in the future), and then paste them below and modify what I need. Following doing this (I used nano to edit the file), that part of my ~/.bashrc would looks like this after making the changes noted above (I only changed the first PS1 line in the modified block):
#if [ "$color_prompt" = yes ]; then
#    PS1='${debian_chroot:+($debian_chroot)}\[\033[01;32m\]\u@\h\[\033[00m\]:\[\033[01;34m\]\w\[\033[00m\]\$ '
#else
#    PS1='${debian_chroot:+($debian_chroot)}\u@\h:\w\$ '
#fi

## my modified prompt
if [ "$color_prompt" = yes ]; then
    PS1='${debian_chroot:+($debian_chroot)}\[\033[01;32m\]\u@microbialomics.org\[\033[00m\]:\[\033[01;34m\]${PWD}\[\033[00m\]\$ '
else
    PS1='${debian_chroot:+($debian_chroot)}\u@\h:\w\$ '
fi
Then I exited and saved my changes to the ~/.bashrc file by pressing ctrl+x, the y key, and then enter/return.
As mentioned above, that ~/.bashrc file is loaded when we start a new session, so right now the changes we made haven’t taken effect yet. We could start a new session, or we coul jus tload the updated file like so:
source ~/.bashrc
And now our prompt will have changed, making it super-convenient to copy/paste when using scp to send something to or from the remote machine 🙂
What is an alias?
An alias is typically just a shorthand for a longer one-liner command. For instance, here is a contrived example of how we can set an alias for the current session.
date by itself prints out a few things, but we can get just the day with date +%A:

If this were something we used a lot, we could set an alias to execute date +%A for us without us needing to type out the full command. Here we are making an alias called today to do this for us.
If we just try to run today right now, we will get a command not found error. Here’s how we set it:
alias today="date +%A"
And now we’ll get the day:

But doing things like above, it is only for the current session, and it will be gone when we exit and sign back in. To keep an alias, we need it to be set by one of the startup scripts, which we’ll cover now.
Where to set a permanent alias
In the ~/.bashrc file again, there are likely also some lines that look like this (if they don’t exist, you can add them):
if [ -f ~/.bash_aliases ]; then
    . ~/.bash_aliases
fi
As mentioned above, this ~/.bashrc file is run everytime a session is started. In that file, these lines of code are saying “if the file ~/.bash_aliases exists, then also run that file to setup what is in there”. (We could just put aliases in the ~/.bashrc, but it’s also common practice to keep them in their own file as we’ll do here.)
So we are going to add our commands that set up our aliases to that ~/.bash_aliases file, and then they will be loaded anytime we start a new session – therefore making them always available to us.
How to set a permanent alias
Just like with modifying the ~/.bashrc file, it’s generally easiest to add these with a text editor like nano (which is what I’ll be using here).
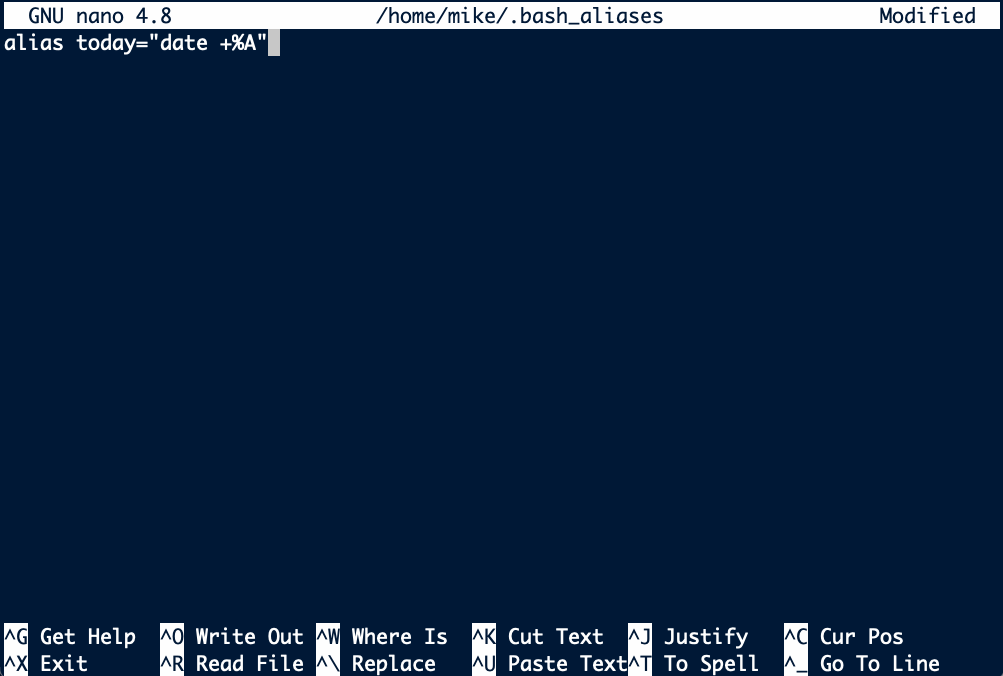
Here’s how we would add the above, just to serve as an example of how we can add them permanently. We can edit (and/or create if it doesn’t yet exist) the ~/.bash_aliases file with the following:
nano ~/.bash_aliases
And then paste in our command to create the alias:
alias today="date +%A"
To save and exit nano, we can press ctrl+x, followed by the key y, followed by pressing enter/return.
And remember we need to source the ~/.bashrc file for the changes to take effect in our current session:
source ~/.bashrc
Now that alias will always be there when we sign in. But we probably don’t want to keep that one, so we could always delete that line from the ~/.bash_aliases file with any editor (like nano). This was just an example to explain the process, but now we’ll look at some I actually use frequently.
Some aliases I find helpful
Below are some of the aliases I typically setup on any machine I will be working on regularly.
Store last command
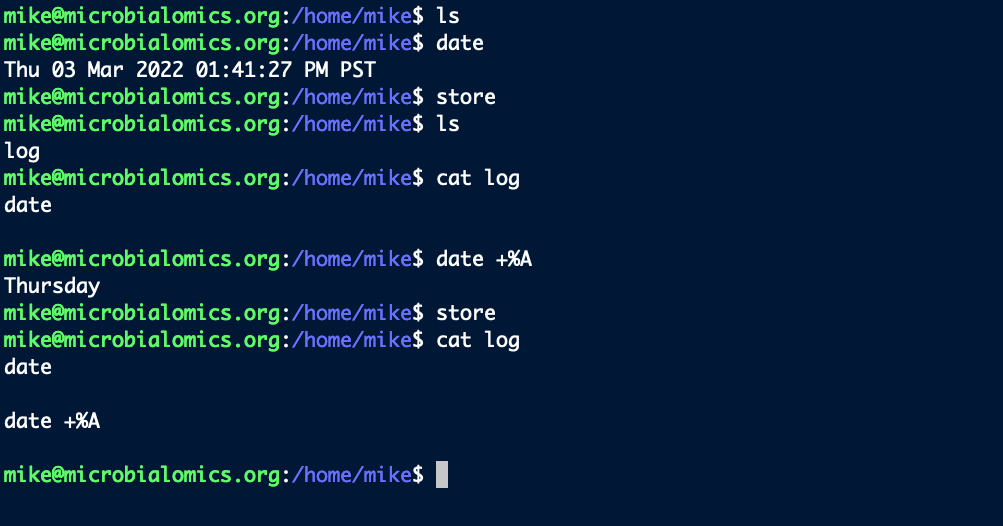
I like to create an alias that appends the last command I ran into a file called ‘log’ in the current working directory. I find this really handy when I am testing/figuring things out.
When I find the command I want, and I want to save it, instead of copying and pasting the last thing I ran, I can just type store, and it is added to the log file for me.
This one-liner will do this for us:
history -p !!:p >> log; printf "\n" >> log
Which would be annoying to type out in full everytime we want to use it, so instead, let’s create an alias in our ~/.bash_aliases file by coping and pasting this into that file (see example just above if needing a reminder on using nano to do this):
alias store='history -p !!:p >> log; printf "\n" >> log'
And remember we need to run this so the changes to be in effect in our current session:
source ~/.bashrc
Now whenever we want, we can run store to save the last command we ran in a file called ‘log’ in the current working directory:
Get the size of and sort all items in a directory
When in the crunch of trying to see where all our storage has disappeared to, I find it convenient to run something like this which will :
du -sh * | sort -h
But I don’t like to remember or type all that out. So I add this alias to my ~/.bash_aliases file:
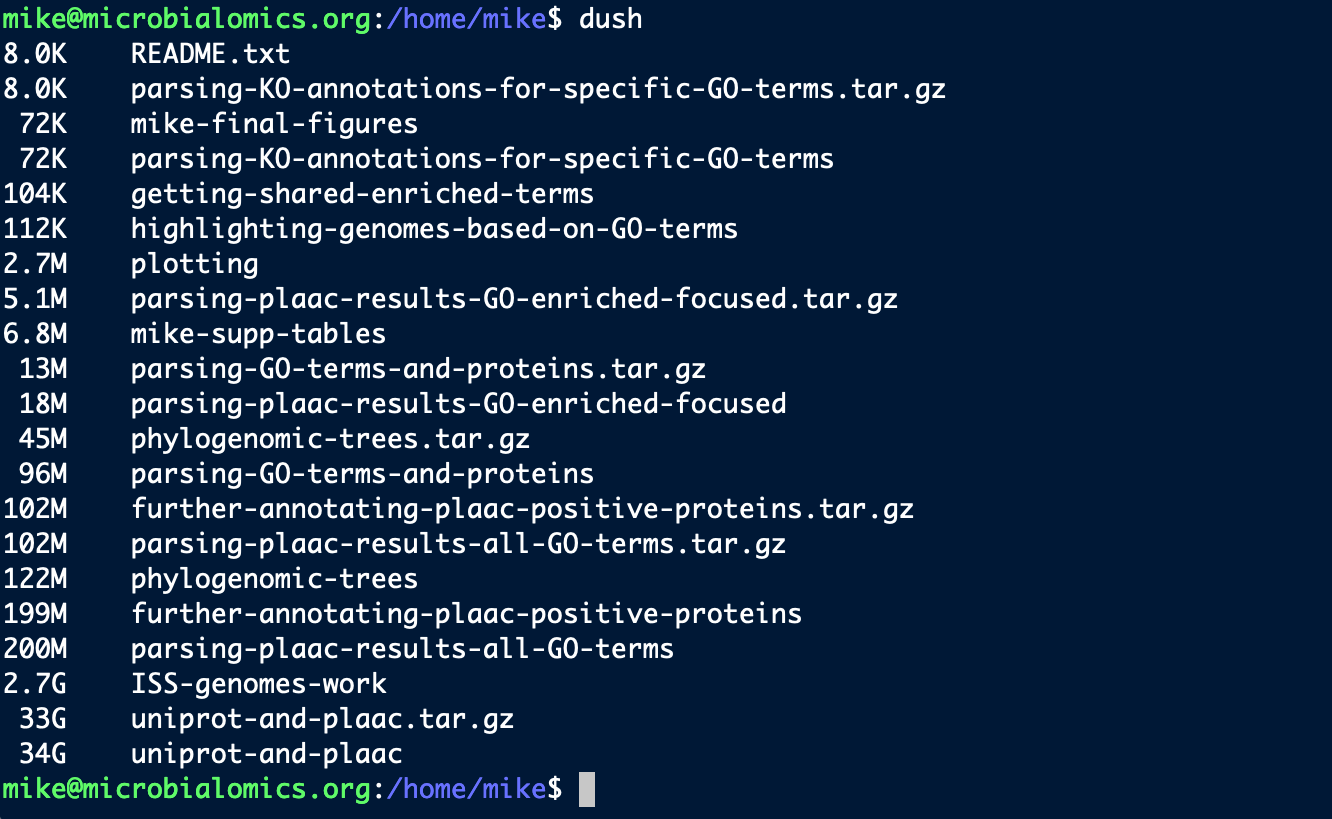
alias dush='du -sh * | sort -h'
Now just running dush will list the sizes of all directories and files in the current working directory in order of size:
Printing in formatted columns
column is a handy command for quickly viewing plain text tables like tab-separated value (tsv) and comma-separated value (csv) files, but I typically like to give it a few arguments I’d rather not type out each time. So I have these for tsv and csv in my ~/.bash_aliases file:
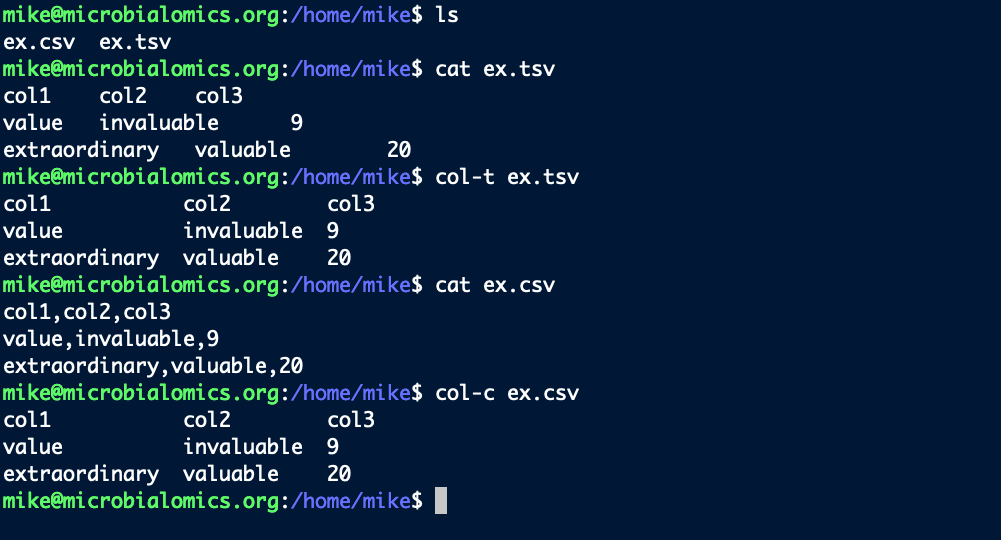
alias col-t="column -ts $'\t'"

alias col-c="column -ts ','"
source ~/.bashrc
So it’s easier to quickly check out table files in a more organized fashion (note I typically pipe the output of head or tail into this):
SSH connections
I connect to remote computers pretty much all day everyday. So I don’t always want to type out the connection (especially for ones where I need to use an IP address intead of words). So I will typically add an alias for connecting to any remote machine I use regularly. E.g., if this were real, I would add this to my ~/.bash_aliases file:
alias hb-connect="ssh mike@microbialomics.org"
source ~/.bashrc
And now I would just have to run hb-connect to connect and get my password prompt.
Using aliases to quickly access info
The following examples likely won’t be helpful exactly as they are, but I include them just to show another way I happen to use aliases that has been helpful to my efficiency at the command line. It’s basically just storing some short notes at our fingertips so we don’t have to look anywhere for them whenever we need them 🙂
GDrive notes example
I occassionally want to access my google drive from the command line (I use GDrive for this). But I don’t do it enough to actually remember how to do it. So I have a short file with some info and example commands stored somewhere on my system, e.g., maybe at ~/notes/gdrive-notes.txt, and I have an alias that prints out that file to my terminal. So anytime I end up in a situation where I want to use GDrive, I don’t need to google to find the documentation or search for my previous notes trying to find an example of what I need to do. Instead, I just type gdrive-notes and it prints out my most helpful examples instantly. For this example, it’d be adding this to the ~/.bash_aliases file:
alias gdrive-notes="cat ~/notes/gdrive-notes.txt"
And so when I run gdrive-notes, this prints out to my terminal:
#########################################################

## My gdrive notes ##

# helpful sites
https://github.com/gdrive-org/gdrive
https://www.howtoforge.com/tutorial/how-to-access-google-drive-from-linux-gdrive/

# list most recent additions
gdrive list

# list with search term, limit to 10:
gdrive list -m 10 --query "name contains 'Europa'"

# can get more info with the ID associated with things, e.g.:
gdrive info 1alvKgpZwT9sY0blablayOgT6KSXXX_blabla

# can search within a folder after getting the ID like so:
gdrive list --query " '1alvKgpZwT9sY0blablayOgT6KSXXX_blabla' in parents"

# download directory and skip files already present (download file same way but no flags)
gdrive download -r 1alvKgpZwT9sY0blablayOgT6KSXXX_blabla --skip

# upload directory
gdrive upload -r --parent 1alvKgpZwT9sY0blablayOgT6KSXXX_blabla local-directory-to-upload/

# first login/token setup can be done with:
gdrive about
    # this couldn't be authorized by google last time i tried, the
    # workaround for ones setup already on other systems is just copying
    # the ~/.gdrive/ directory to the new system

#########################################################
Most likely quickly giving me an example of whatever I am trying to do 🙂
What is a function?
Another thing we can add to startup files in much the same way as aliases, are functions – which here can be thought of like aliases except that they can also handle positional arguments.
The syntax for creating a shell function can look like this (with the “<..>” parts to be replaced with whatever we want):
<name_of_function> () {
    <things_we_want_to_do>
}
First we will use another extremely contrived example to demonstrate this. Here we are making a function that greets whatever we put as the first positional argument (see the introduction to scripting page if wanting to know more about positional arguments as variables):
greeting () {

    echo "Hi, ${1}! Hope you are well :)"

}
Now when we use it, with the command greeting, it will run the command we specified and put in the variable spot (the ${1}) whatever we provide as the first positional argument:
greeting Mike

These can get as complicated as we want them to be, holding as many lines as we want in the interior code between the curly braces, but that is all we need to know to get started with them 🙂
Where to set a permanent function
Functions we want to be persistently available could also go directly in the ~/.bashrc file, or in the ~/.bash_aliases file like we used above (which would be loaded by the ~/.bashrc on each session startup), but we can also make a dedicated startup file for them if we want. I’ve commonly seen ~/.bash_functions serve this purpose.
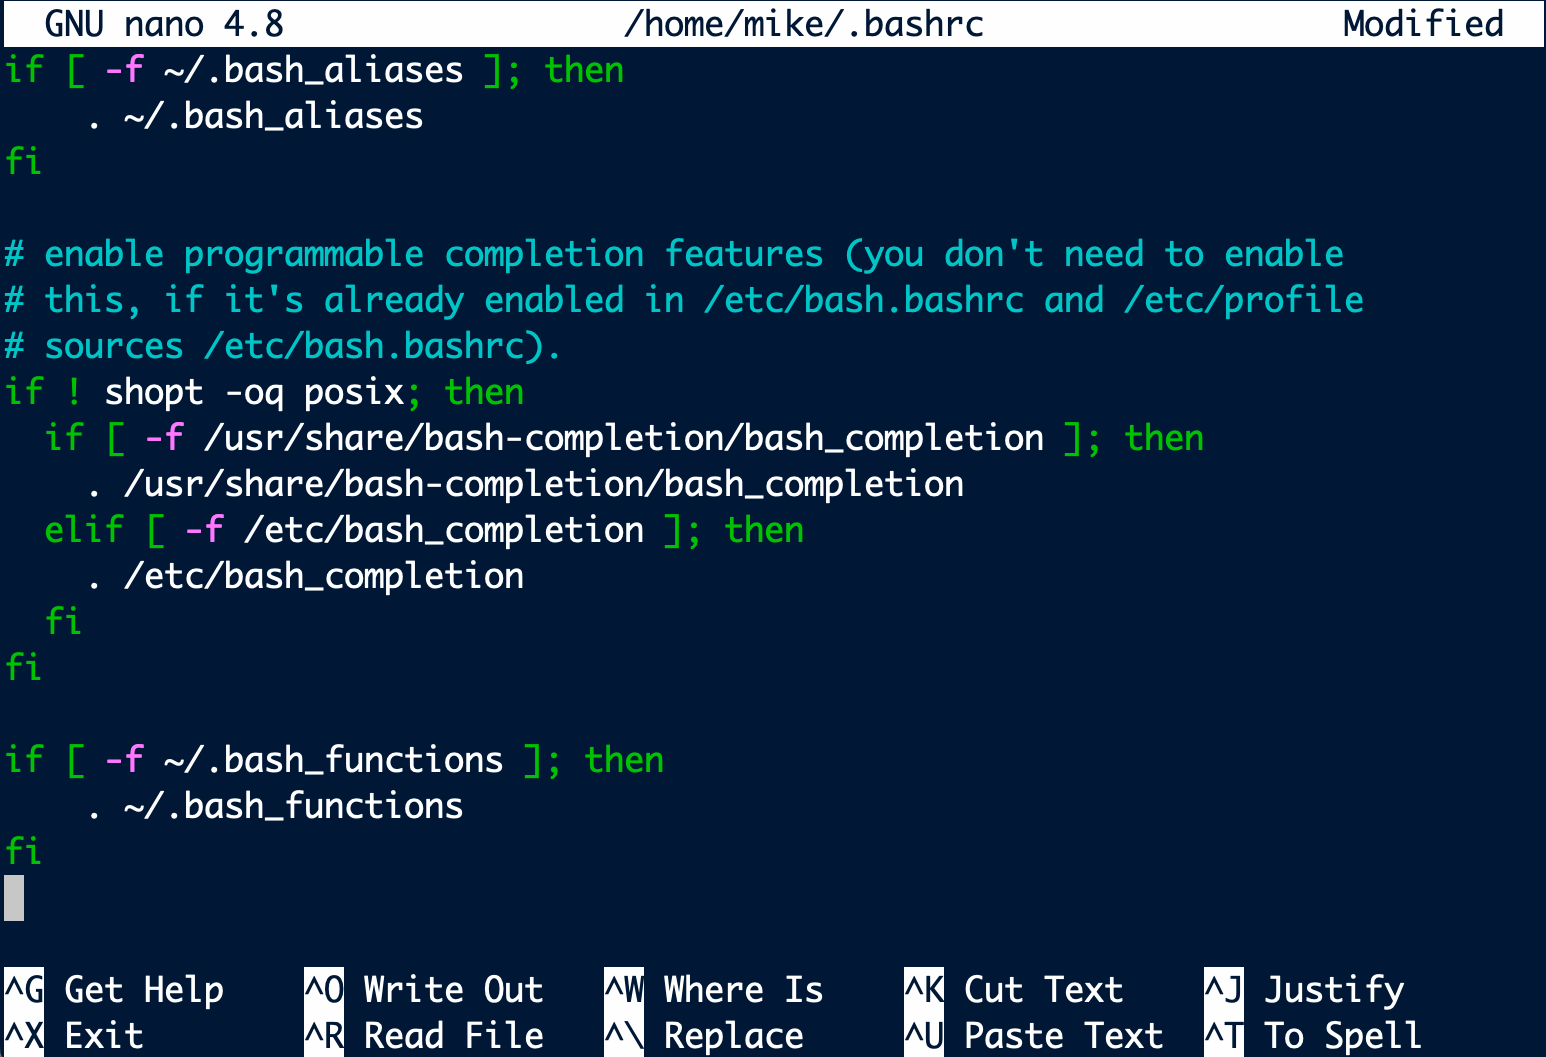
This file is not typically already checked and loaded by the ~/.bashrc file like the ~/.bash_aliases file is, however. So we need to add these lines to our ~/.bashrc file:
if [ -f ~/.bash_functions ]; then
    . ~/.bash_functions
fi
Again, this can be done most easily with a text editor line nano. I just opened it with nano ~/.bashrc, scrolled to the bottom, and added the from text:
To save and exit nano, we can press ctrl+x, followed by the key y, followed by pressing enter/return.
So now that the ~/.bashrc file will check for it and load it if it exists, we are going to add our commands that set up our functions to that ~/.bash_functions file, and then they will be loaded anytime we start a new session – therefore making them always available to us.
How to set a permanent function
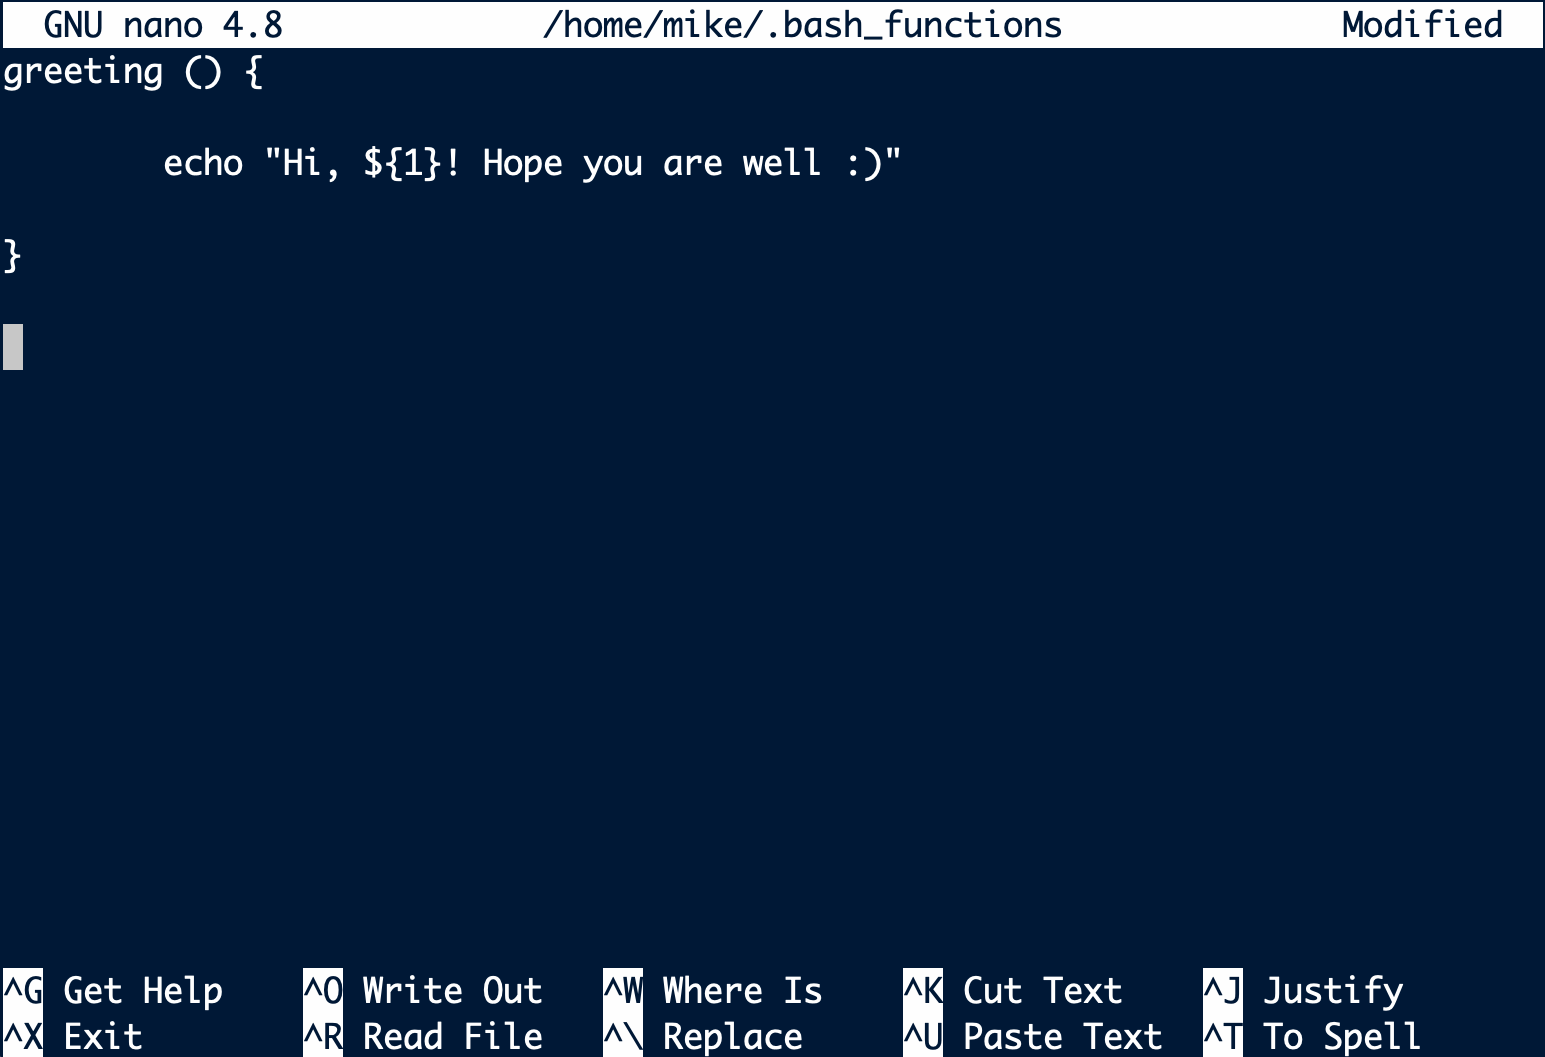
Here’s how we would add the above example function to the ~/.bash_functions file (using nano like before):
nano ~/.bash_functions
And then put in our command creating the function:
greeting () {

	echo "Hi, ${1}! Hope you are well :)"

}
To save and exit nano, we can press ctrl+x, followed by the key y, followed by pressing enter/return.
And remember we need to source the ~/.bashrc file for the changes to take effect in our current session:
source ~/.bashrc
Now that function will always be there when we sign in. If we wanted to get rid of that toy example function, we could just open the ~/.bash_functions file again with any editor and delete it. That was just to demonstrate the process, now we’ll look at one that I find helpful to always have handy.
A few quick functions I find helpful
There are tons of individual-specific things we can do with functions to make our time at the command-line more efficient and easier. Here are just a standard few I typically setup on any machine I will be working on regularly.
Getting indexed column headers
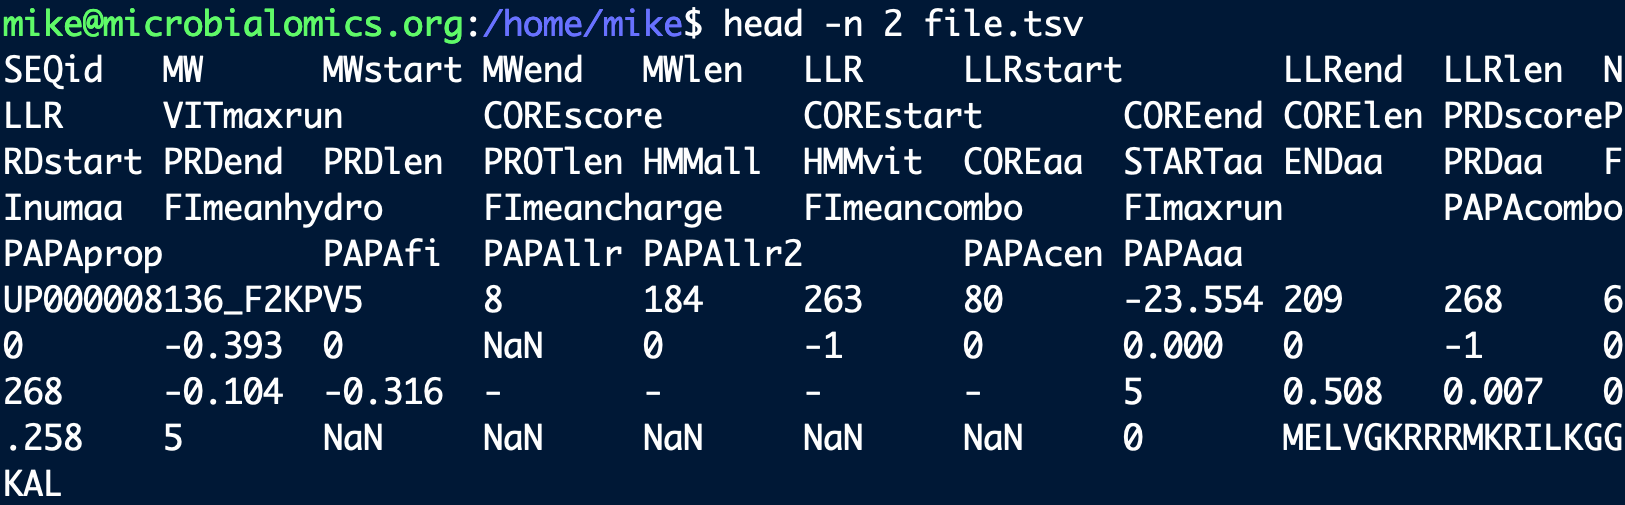
Sometimes I want to use cut or awk on specific columns in a tsv or csv that has lots of columns, and I find myself trying to count the column names to find which numbers I need to pass to the program I want to use. E.g., here is peeking at the first 2 lines of a tsv with about 40 columns:
And say I know I want to act on the “COREscore” column, it can be annoying to try to count the columns to find out which number that one is. There is a short one-liner we can use to list them with numbers pretty quickly, e.g.:
head -n 1 file.tsv | tr "\t" "\n" | cat -n
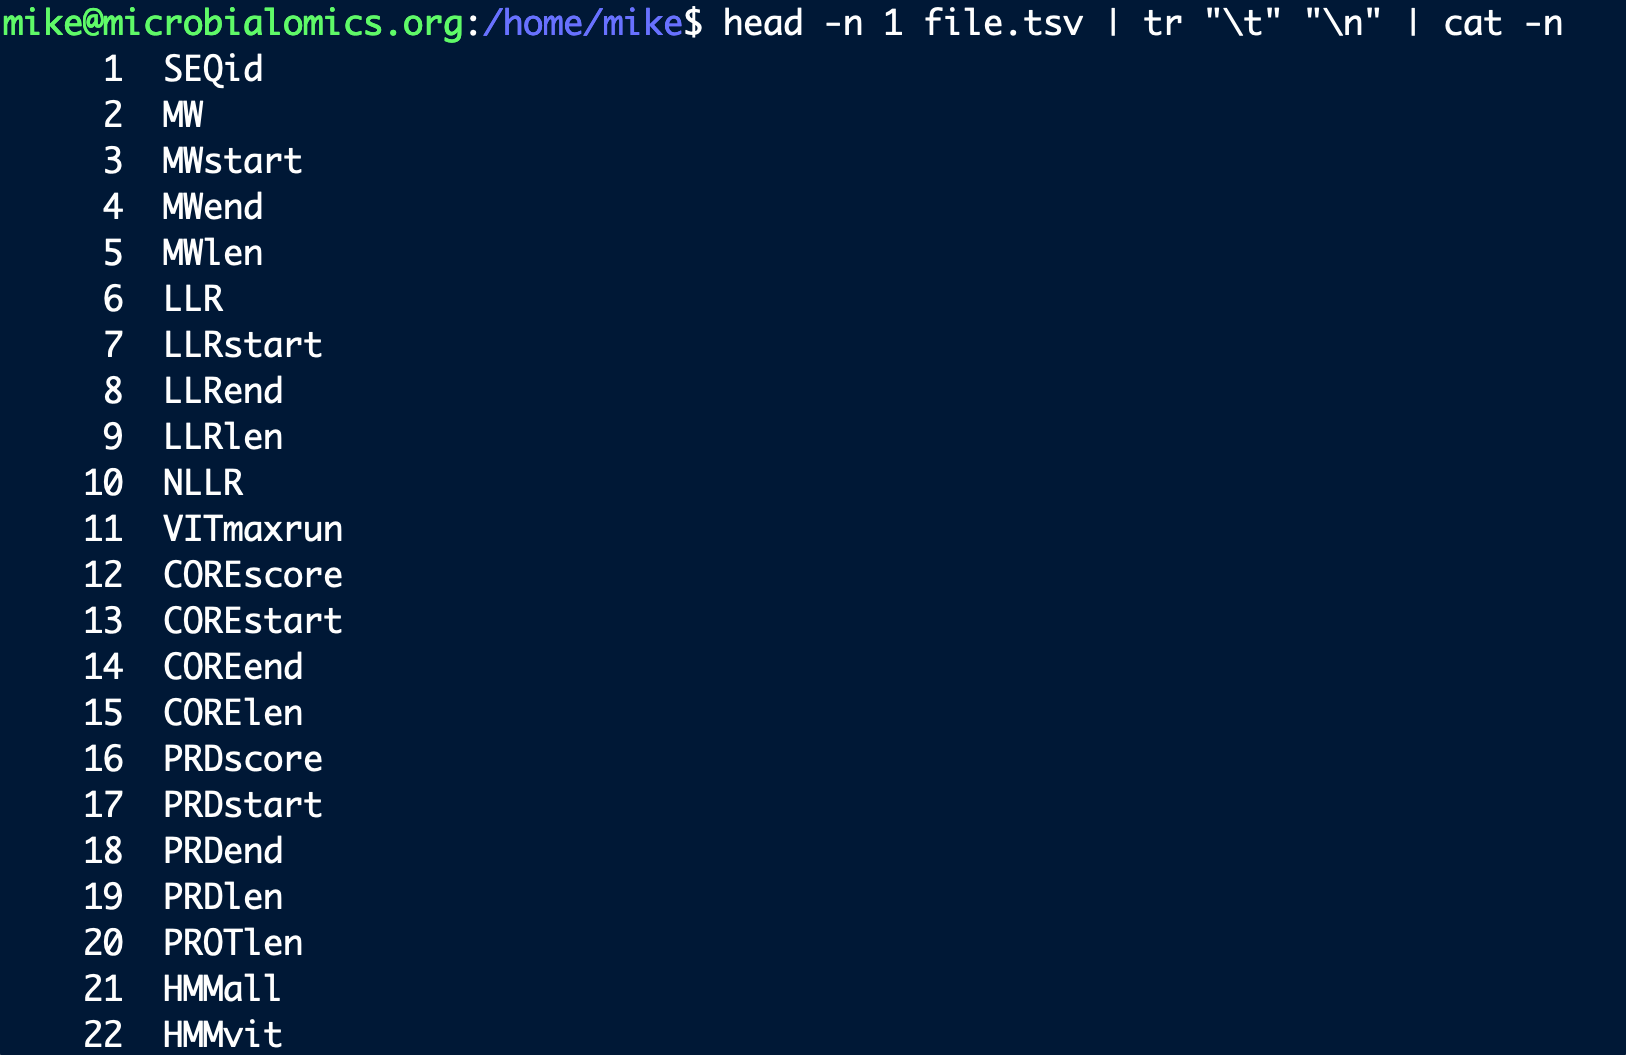
Where we are getting the first line with head, changing the delimiter into a newline character with tr, then piping that into cat with an argument to add line numbers. Then, if I wanted to act on the “COREscore” column with something like cut or awk, I can quickly see it’s column number 12.
That’s great, but it’s nicer to just type one word quickly to do this.
As mentioned, aliases can’t handle positional arguments, which is why we are putting this in a function. I typically add one for tsv files and one for csv files, rather than one that handles both with an addtional positional argument to specify the delimiter (which would be fine too and maybe preferred by some). So I’d add these to the ~/.bash_functions file with nano:
nano ~/.bash_functions
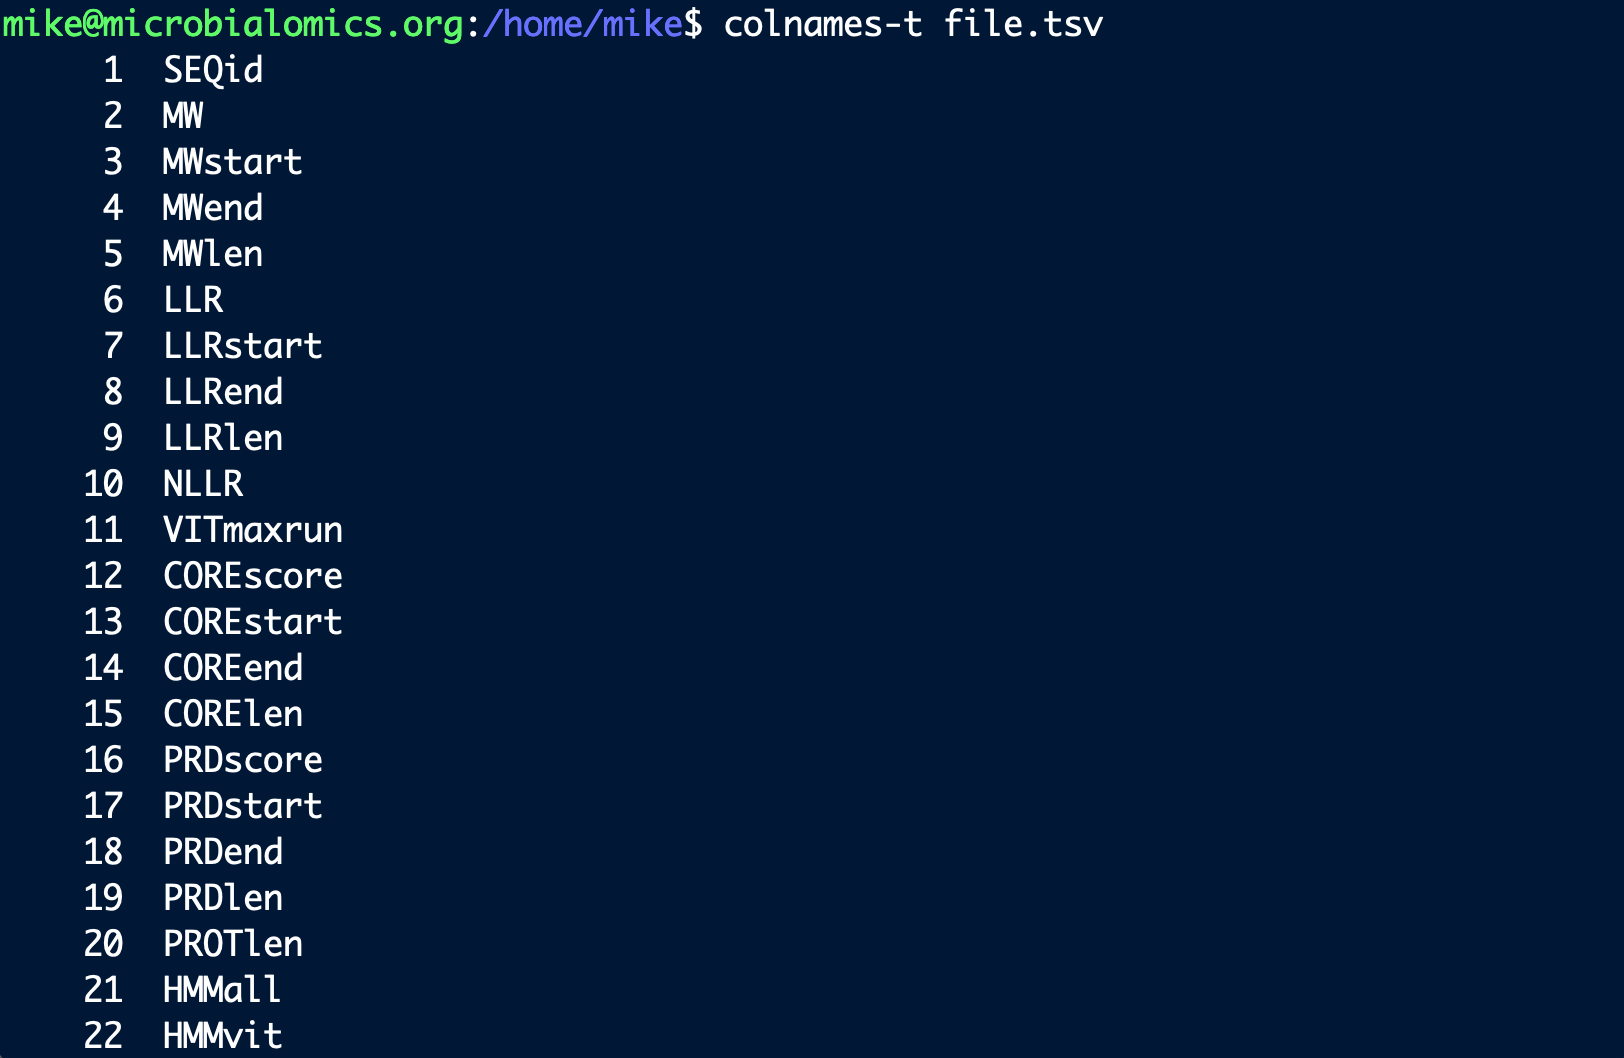
colnames-t () {

	head -n 1 ${1} | tr "\t" "\n" | cat -n

}

colnames-c () {

	head -n 1 ${1} | tr "," "\n" | cat -n

}

And making sure they are loaded to take effect in the current session:
source ~/.bashrc
Now we can always use them quickly with a single command instead of typing out the full one-liner ourselves each time:
Printing out my standard blast commands
It’s usually easiest to look up a command-line blast I previously ran whenever I run a new one. So I added a function to print out what I usually do. This includes: an example of the base blast command (if I’m not making a blast db); adding a column of the percent of the query that aligned; and adding a header).
blast-typical() {

    cat << 'EOF'

blastn -task blastn -query queries.fa -subject refs.fa -outfmt "6 qseqid qlen sseqid slen qstart qend sstart send length pident evalue bitscore" -max_hsps 1 -max_target_seqs 1 > blast-results.tmp
awk -F '\t' ' { pct_qaln = ($5 / $2) * 100 } { printf "%s\t%.2f\n", $0, pct_qaln } ' blast-results.tmp > blast-results2.tmp
printf "qseqid\tqlen\tsseqid\tslen\tqstart\tqend\tsstart\tsend\tlength\tpident\tevalue\tbitscore\tpct_qaln\n" > blast-results.tsv
cat blast-results2.tmp >> blast-results.tsv
rm blast-results.tmp blast-results2.tmp

EOF
}
After adding that to the ~/.bash_functions file and sourcing it or our bashrc like we did above, or launching a new terminal, running blast-typical at the command line will print out my usual steps so I can copy/paste them and modify as needed.
Conda activate and deactivate helper function
I am lazy, so I tire very quickly of fully typing out conda deactivate and conda activate blabla over and over again. So I put this helper function into my ~/.bash_functions file:
cda() {

    if [ -n "$CONDA_DEFAULT_ENV" ] && [ "$CONDA_DEFAULT_ENV" != "base" ]; then
        conda deactivate
    fi

    if [ -n "$1" ]; then
        conda activate "$1"
    fi

}
And that let’s me just type cda blabla and it will deactivate the current environment (unless I’m already in base) and then activate the wanted environment I specified 👍
There are virtually always more and better ways to do things, and we all have tips and tricks we’ve developed or come across that might help others. So if you have any particularly handy things you think might be useful to others, please share! You can suggest things to add through posting an issue, cloning the repository and making the suggested additions yourself and submitting a pull request if wanted, or just reach out to me however 🙂